

Part art and part exact science, it’s easy to brew a cup of coffee—it’s less easy to brew a really good cup of coffee. Even though coffee brewing has been “a thing” now for literally thousands of years, many of the current methods used to brew it have been around for much less time.
Table of Contents
The Coffee Brew GuideBrew Methods
- Pour Over
- Chemex
- French Press
- AeroPress
- Espresso
- Cold Brew
- Percolator
- Coffee Bags
- Siphon Coffee (Vacuum Coffee)
- Cowboy Coffee
- Moka Pot
The Coffee Brew Guide
Today, there are numerous methods you can use to brew this miracle bean—and I’ve covered just about all of them in this guide. Note that this is a guide for brewing, not just making coffee. There are countless different types of coffee drinks out there, but almost all of them will use the equipment and brewing methods mentioned below.
Brewing Terms
While most of the terms you’ll encounter below are fairly commonplace, there are a few “specialized” terms I’ll be tossing around in the brewing guides below. These include:
Blooming
Also called “pre-infusion,” blooming is a step in many coffee brewing methods. It involves pouring water over coffee grounds and waiting for the coffee to “grow” and release gases. While you’ll still get coffee at the end of the process if you forget to bloom, it won’t taste quite as good.
Extraction
In brewing, extraction is what happens after the water hits the coffee grounds. As the coffee steeps, the soluble materials from the coffee (flavors, caffeine, etc.) leave the grounds and enter the water. Over-extraction is when this step goes on for too long, resulting in stronger coffee but with an increasingly bitter, undesirable taste.
Moka Pot
Used in certain brewing methods, such as making Cuban Coffee, a Moka Pot is a coffee maker that brews by forcing pressurized boiling water through ground coffee.
Brew Methods

Pour Over
Brewing Instructions
- Bring water to a boil using a kettle. (Preferably a gooseneck kettle)
- (Optional, if using whole beans) Grind your coffee beans to a medium-fine consistency.
- Measure out your coffee grounds and put them in your cone-shaped filter.
- Once water has cooled from a boil, slowly pour it over the grounds in a circular motion to allow the coffee to bloom.
- Once the coffee has bloomed, pour the rest of your water over the grounds.
- When the coffee stream slows to a drip, you’re done!
Tips
- If the water rises more than half-way up the cone when you’re pouring in the water, stop and allow the water level to lower before you continue.
- If the water goes through the filter too quickly, your grind is too coarse.
- If your water is taking too long to get through the grounds, your grind is too fine.

Chemex
You may have seen a Chemex at your local coffee house and wondered “what’s the difference between brewing with that and my pourover brew setup at home?”
The answer? Not much.
A Chemex is just a type of (more expensive) pourover brewer that uses (more expensive) proprietary filters. Along with the difference in the filters comes a difference in grind size. A coarser grind is used with Chemex brewing because the water moves through a Chemex filter more slowly, and vice versa.
Many pourover brewers you’ll find on the market today are visually based on the original Chemex design from the 1940s.
Both kinds of brewers make delicious coffee, though the Chemex filtration process results in coffee with a slightly different taste profile that many people prefer.
However, many other people can’t tell the difference between coffee brewed in a standard pourover brewer and coffee made with a Chemex at all. I’d describe pourover coffee as brandy and Chemex coffee as Cognac.
Therefore, if you’re using a Chemex, you can follow the instructions for pourover brewing above—just use a coarser grind size to offset the slower drip.

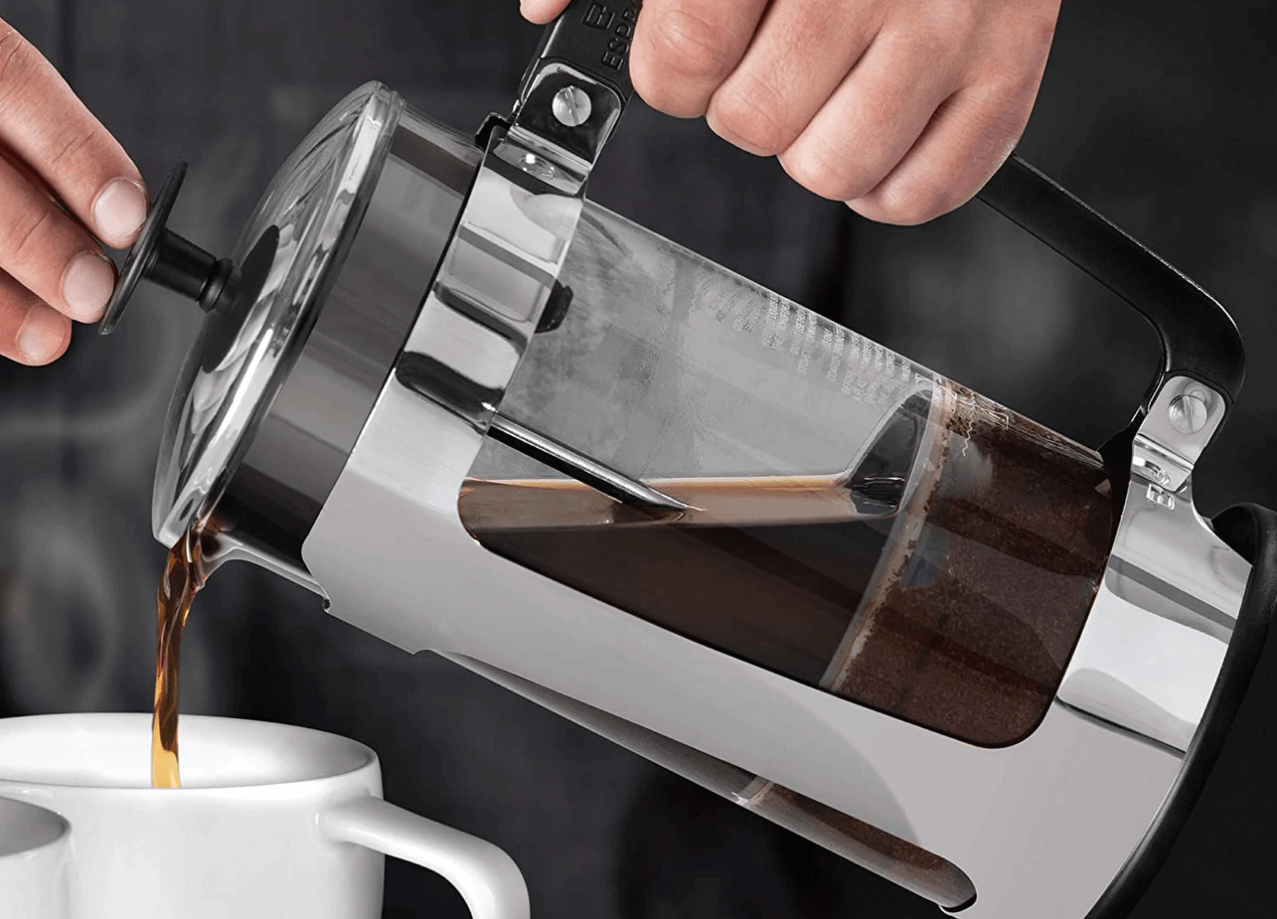
French Press
Brewing Instructions
- Bring water to a boil with a kettle or a pot.
- Place your ground coffee in the chamber. If you’re grinding your own beans at home, grind to a coarse (but even) consistency.
- Wait a minute for your boiling water to cool to about 195°F, then slowly pour it over the grounds.
- Use a heat-resistant paddle, straw, bamboo chopstick, or other appropriate “stirring device” to gently stir the coffee. Allow it to bloom for 30 seconds.
- Pour in more water, and place the lid on top of the chamber. Don’t plunge yet—let the coffee sit in the chamber for about 4 minutes.
- Press the plunger down and serve the coffee immediately.
Tips
- A common coffee:water ratio for brewing with a French press is 1:12, but feel free to experiment and alter this ratio to suit your own preferences.
- If it’s too hard to push the plunger down, your grind size is too fine. If the plunger goes down too easily, your grind is too coarse.
- The water you use should be approximately 195°F, but there’s no need to obsess over this if you don’t have a kettle with temperature control. Just make sure you give the water time to cool down from a boil—just a minute, or two. Adjust as needed if your coffee tastes scorched or if it comes out lukewarm.

AeroPress
All things considered, the AeroPress is very similar to the French Press it was originally based on—with some small differences that result in a faster (and more portable) brewing process. It uses small, proprietary circle-shaped paper filters, but they’re very affordable and you get stacks of hundreds when you buy the AeroPress itself.
Instructions
- Insert a filter in the cap and screw the cap onto the AeroPress chamber (the piece with the markings).
- Measure out your coffee grounds and place them in the chamber using the AeroPress scoop—1 heaping scoop for each cup of coffee. If you’re grinding your own coffee beans, use a medium-fine grind.
- Bring water to a boil and allow it to cool to approximately 200°F (Or use a kettle with temperature controls to heat water to about 200°F.)
- Place the AeroPress chamber over a large, sturdy mug on a solid, sturdy surface like a countertop.
- Pour just enough water into the chamber to completely saturate the grounds; allow coffee to bloom for 30 seconds.
- Pour in the rest of the water according to the number markings (1 = 1 cup, 2 = 2 cups, etc.) , and stir using the AeroPress paddle for at least 10 seconds.
- After 2 minutes, insert the plunger and slowly push straight down until you hit the grounds.
Tips
- If you’re coming from a French Press, make sure to use a medium-fine grind instead of a coarse grind. It’s easy to overlook this small detail amid the similarity between the two brewing methods.
- As with the French Press, if it’s too hard (or nearly impossible) to press the plunger down, you’re using too fine of a grind or too much coffee. Back off the plunger before you make a mess. If it’s too easy to push the plunger through the chamber, your grind is too coarse.

Inverted Method
The design of the AeroPress allows for an upside-down brewing method that a lot of people prefer. The purpose of inverting the AeroPress is to give the water more contact with the grounds before it passes through the proprietary filters while maintaining a short brewing time.

Espresso
Espresso is one of the most difficult types of coffee brewing to master, but don’t worry—you can still pull good espresso without being a seasoned barista.
One of the keys to making good espresso at home (other than having good equipment) is nailing the grind consistency. Don’t worry about getting this perfect the first time, though. You’ll get better with every shot you pull.
If you don’t have a scale to weigh your espresso, that’s okay. Focus on getting the other aspects of the brewing process down first—then, later, you’ll probably want to invest in a scale to start perfecting your espresso.
Remember, this all takes practice—don’t expect your first shot to be perfect!
Instructions
Important: Always follow instructions for your specific machine over the general instructions below—this is just a basic guide and some things might be different with your espresso machine.
- Make sure the machine is all warmed up and ready to go. The amount of time this takes will depend on your machine—some take nearly half an hour before they’re ready!
- Measure and grind your espresso beans to a fine consistency.
- Put the portafilter on the scale and fill it with about 20g of finely-ground coffee. Level it off/spread the grounds with your hand until it’s smooth.
- Now comes the fun part—tamping. Tamping espresso is an art all unto itself. Start by holding the tamper with your thumb and index finger (as if you were holding a doorknob). Use even, medium pressure—about 15 lbs or so*—to start.
- Once you’ve formed the coffee grounds into a puck shape, start pushing down with more pressure—about 20 - 30 lbs. Twist as you pull up, but don’t twist as you push down. (See what I mean about tamping being an art?)
- Check the puck for loose grounds, and wipe off any excess grounds that spilled around the edges of the portafilter. Remember, it should look like a flat, clean puck.
- For your first shot pull, aim for around 20 - 30 seconds.
- Hey man, nice shot!
Hopefully your first homemade shot of espresso tastes dark, delicious, and rich—but it might not. You’ll get better at pulling shots with practice.
Tips
- “Espresso beans” aren’t a different species than coffee beans or anything—they’re just coffee beans that are recommended for brewing espresso by the roaster.
- If your espresso tastes sour, it’s probably under-extracted. Try grinding your beans more fine.
- If it tastes too bitter, it’s probably over-extracted. Go coarser next time.
- If you have an espresso machine with a built-in grinder, you can just grind your coffee beans right into the portafilter!
- Some machines have pressure gauges that can help you perfect your shot pulling.
- *You’re probably wondering how the hell you’re supposed to know what x lbs of pressure feels like. To learn what it feels like to tamp with the right amount of pressure, you can push down on a scale until it reads 15lbs, 20lbs, 30lbs, etc. A less efficient way to get a feel for the pressure is to have a series of different-sized dachshunds weighing between 15 - 30 lbs lay all of their weight on you.

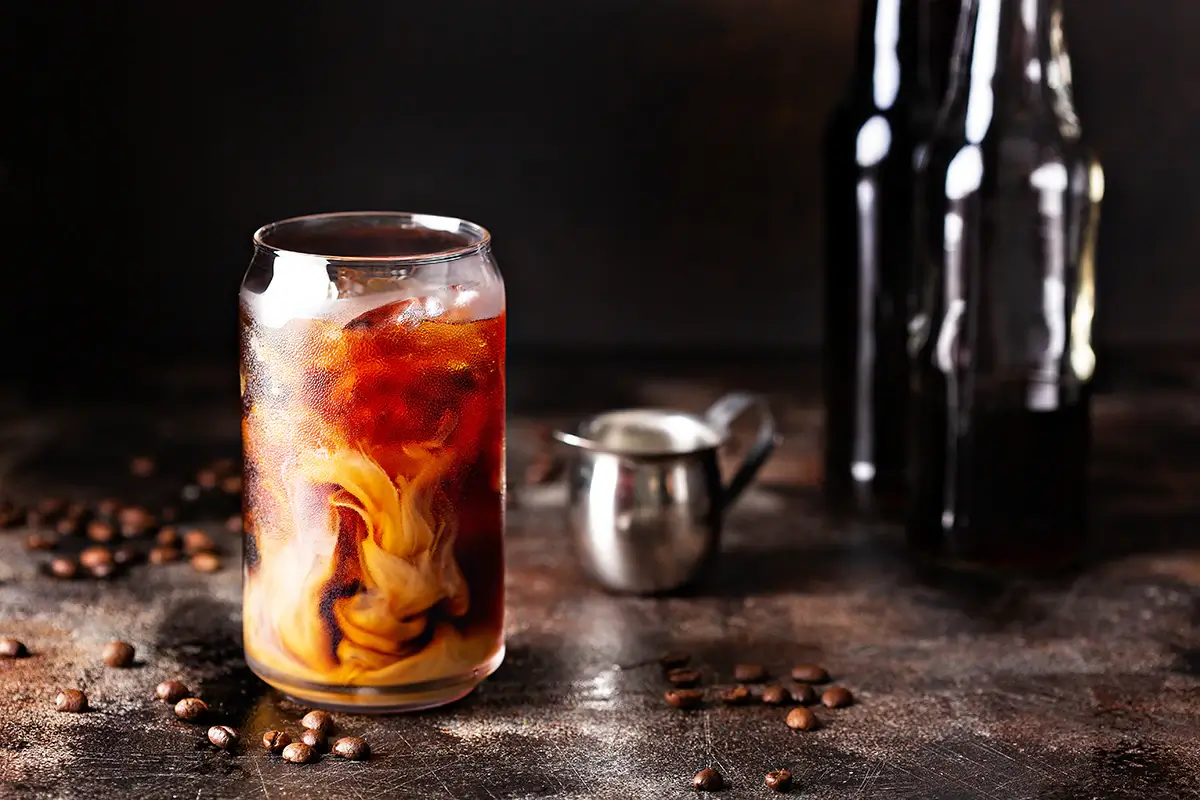
Cold Brew
If it’s your first time making cold brew at home, a good ratio of coffee to water is 1:5.
As with pretty much every other type of brewing, it’s “ideal” to use a scale to measure out your coffee. But don’t worry too much about this.
As long as you’re okay with trial and error—hopefully more trial—just use scoops, measuring spoons, or just eyeball it. You can be a coffee snob about things once you’ve learned how to make cold brew in the first place.
One thing I do highly recommend being a “snob” about is grinding your own beans. The reason is that you’ll want a coarse grind for making cold brew to avoid over-extraction (i.e. bitter tasting coffee). Pre-ground coffee generally doesn’t come in a coarse grind unless you request it. If you happen to have some, go for it! Whatever you do, just don’t use a fine grind or your cold brew will taste objectively terrible.
If you’re not using a dedicated cold brewer, you’ll need two clean, appropriate containers (large mason jars are perfect).
Instructions
- Grind your coffee beans to a coarse consistency, and measure out your coffee and water. (1 part coffee to 5 parts water)
- Mix the coffee with the water and stir for at least 10 seconds.
- Allow the coffee to steep in your fridge for at least 12 hours, but no more than 24. 12- 16 hours is a good range to aim for.
- Use coffee filters or cheesecloth to strain the coffee into a new container. (If you’re using a dedicated cold brewer, you’ll probably have a filter for this already.)
- Store your delicious cold brew concentrate in the refrigerator. Serve over ice cubes, and add water or milk at a 1:1 ratio.
Tips
- Remember that what you made is concentrate—drinking it without diluting it is not recommended.
- If you don’t have a refrigerator “handy,” you can still make cold brew! You can use a sealed container/mason jar at room temperature. You’ll want to store any extra in some sort of fridge or cooler when it’s done, however (chill the jar in an ice bucket, have a Yeti hold it, etc.).
- The longer your coffee steeps, the stronger it will be. Between about 16 and 24 hours of steeping, it will begin to become a very strong cold brew concentrate. After about 24 hours of steeping, it will taste increasingly bitter due to over-extraction.
- Steep for a minimum of 9 hours—not 7, not 8, not 8 ½. A lot happens right around the 9 hour mark. Steeping for too short of a time will result in watery, weak cold brew.

Percolator
Instructions
- Fill the lower chamber of your percolator up with water.
- Set the percolator on a stove burner or range top.
- Add ground coffee into the top chamber and heat until it boils.
- Once you hear the percolator start making its unique “perking” noise, remove your coffee from the heat source and serve. Use some good oven mitts, because it’s very easy to burn yourself on the outside/bottom of a hot percolator.
Tips
- Don’t overfill the percolator with water—it needs space inside to work its perking magic.
- It’s generally accepted that brewing with a percolator isn’t necessarily the best method if you really want to appreciate the flavor and aroma of gourmet coffee beans. This is why I didn’t include the grinding step in the instructions. If you’re going through the trouble of grinding fresh coffee beans, you’ll probably want to choose another brewing method if one is available.

Coffee Bags
And now for something completely different—brewing using “coffee bags.” Basically like instant coffee but called something else, coffee bags are the result of an unfortunate teabagging accident at the factory, except they decided to keep making it.
That’s not the real story, but once you’ve brewed with coffee bags, you won’t be interested in learning the origin story anyway. It’s coffee—in a tea bag—period. They work like really expensive, wasteful tea bags.
Coffee bags are a little like a less convenient version of Keurig brewing but slower and with less flavor.
Instructions
- End up in a situation where the only caffeine available to you is a coffee bag. Maybe you’re in a Tokyo hotel at 3AM and having trouble adjusting your sleep schedule, and you find some of these in your room.
- Boil some water using an electric or stovetop kettle.
- Submerge the coffee bag in water and allow it to steep for about 3-4 minutes.
- Throw the coffee bag away. (Optional: Do this as the first step)
Tips
- There are much better alternative ways to brew coffee out there. There are 10 of them in this brewing guide alone. Unless you have nowhere else to turn for your caffeine fix, move on.
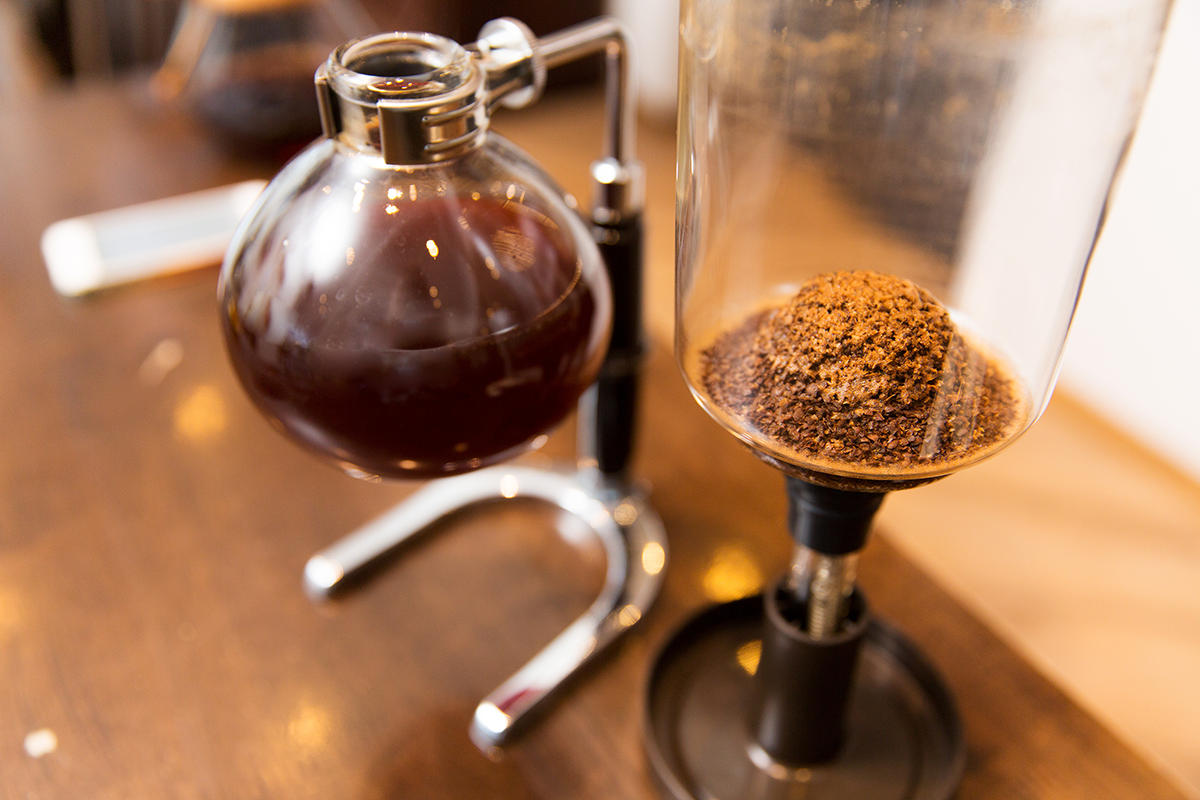
Siphon Coffee (Vacuum Coffee)
Siphon coffee isn’t for the brewing novice—it requires good control and an even better investment in specialized equipment. It’s not that it’s all that complicated or difficult, but you need to get familiar with the process and equipment, get the timing down, and develop a “feel” before it becomes feasible to brew coffee this way.
Interestingly, the vacuum/siphon method actually goes all the way back to the 1830s, but it still hasn’t caught on with consumers.
That said, today it’s considered a cool—if showy—way to brew coffee.
In fact, brewing vacuum coffee is how everyone makes coffee in one of those alternate history timelines where we still use vacuum tubes, everyone wears welding goggles for some reason, and convenience was never invented.
Siphon brewing requires
- A siphon coffee maker. You have one, right?
- Some coffee deserving of such an elaborate brewing process (May I suggest Black Insomnia Classic Roast?)
- Bunsen burner, halogen beam, butane burner or similar heating element
How a siphon brewer works
You probably won’t be referring here for instructions if you’re brewing with a siphon coffee maker. So these instructions are mainly just outlining how the thing works in case you’re curious.
- Attach the siphon filter.*
- Add water, making sure to completely dry the outside of the chamber to avoid cracking during heating.
- Place the bottom chamber over the heat source. Insert the funnel into the bottom chamber loosely.
- While the water heats to a boil, measure and grind your coffee using a coarse consistency.
- When the water is boiling, attach the funnel to the bottom chamber. Make sure it’s attached tight.
- When the water fills the top chamber, add your ground coffee to the water. Stir with a spoon and allow to brew.
- After 1 minute, stir the coffee a second time.
- Allow to brew for about 30 more seconds, then turn off the heat source.
- Watch as the coffee slowly re-enters the bottom chamber.
- As the crowd of spectators that has gathered continues to applaud and whistle, serve and enjoy your vacuum coffee! Be careful not to get burned as parts of this setup may (read: will) still be hot.
*Make sure not to confuse the siphon filter with Syphon Filter, the Playstation game from 1999. The heat from the brewing process will damage and possibly even melt the disc. Besides, if you were going to destroy a Playstation 1 game, why not make it Busby 3D?
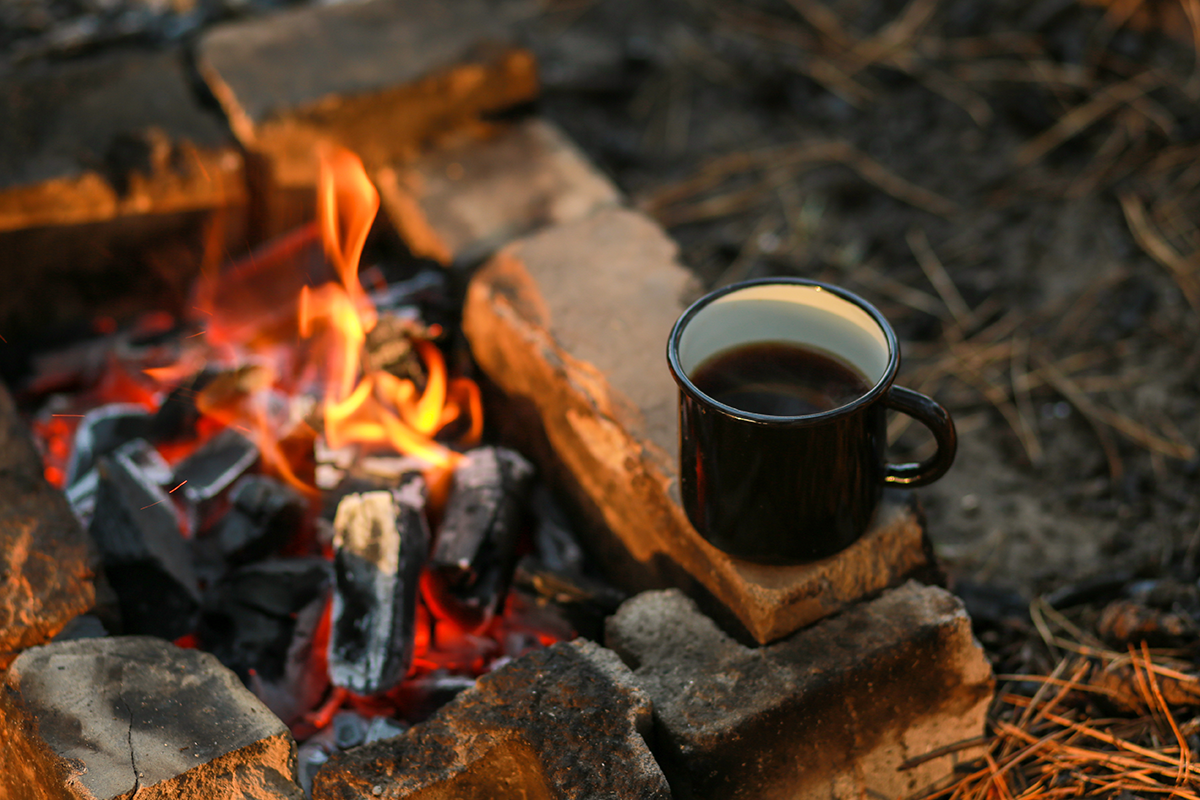
Cowboy Coffee
Perhaps on the other end of the spectrum from siphon brewing, cowboy coffee is a straightforward way to brew coffee that doesn’t require bunsen burners, fancy “chambers,” or hell, even filters.
A pot, a campfire, and a cup is all you need to brew coffee the Old West way (or the “left my AeroPress Go at home” way).
Instructions
- Heat a pot of water over a heat source (ex: campfire, portable burner, etc.) until boiling.
- Remove the pot from heat, and add coffee grounds. Stir the grounds in the hot water, then cover and allow the coffee to steep for a few minutes.
- Holding the pot at an angle so the grounds don’t fall out with the water, serve your cowboy coffee in some appropriate cups—a mug with a picture of a cactus, tumbleweed, or rattlesnake on it is ideal.
Tips
- If you’re brewing cowboy coffee while camping/hiking, be careful about using a metal cup for hot coffee as the outside can heat up. If all you have to drink coffee out of is a metal cup, it’s better to allow the coffee to cool a bit before serving.
- Aim for a ratio of about 1 part coffee to 12 parts water. For example, if you boiled 6 cups of water, use about ½ cup of coffee. You can eyeball it. It’s fine. Use your Dead Eye to slow time down if you want.

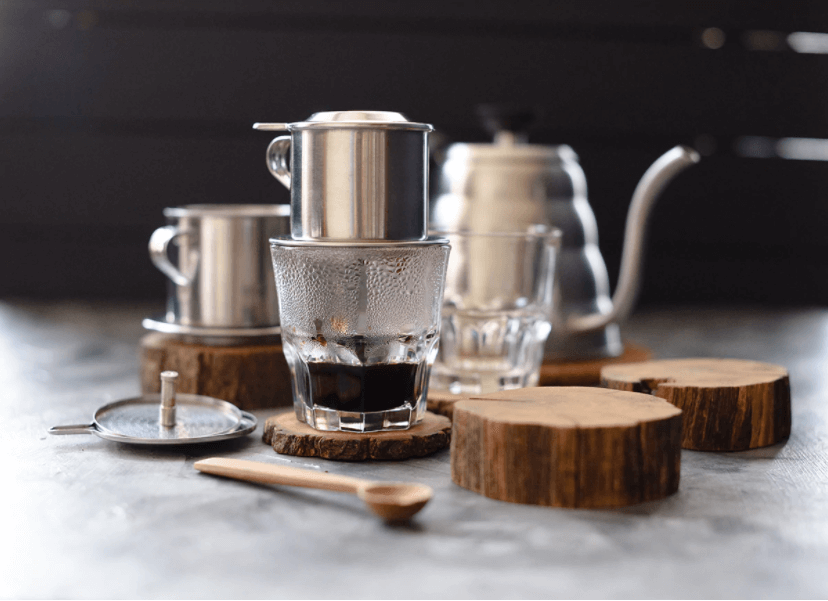
Moka Pot
The Moka Pot is sometimes considered an “affordable espresso machine.” It’s capable of making coffee that is very similar—but not 100% identical—to espresso. They’re usually made of bakelite or aluminum, and they look a bit old fashioned. That’s because the general design hasn’t really been updated for… well, close to a century now.
While moka pots aren’t as common in the United States as they are in a lot of other parts of the world, they’re practically essential when making certain types of coffee, like Cuban Coffee.
Instructions
- Place cold water in the lower chamber of the Moka pot, and place it over medium heat on a stovetop burner or range top. Remove the lid or leave the lid open.
- Place ground coffee in the filter basket (or “middle chamber”) and tamp it down with your fingers, leaving the top chamber empty.
- As the water boils and the coffee begins moving upward and to the spout, remove the Moka pot from your heat source.
Tips
- Moka pots are deceptively simple looking—while they’re easy to use once you get the hang of the process, getting the temperature just right can take practice.
- If the moka pot “spurts” out the spout prematurely, the water is probably too hot. However, it’s normal for this to happen at the end, when the coffee is lighter in color.
- Being careful not to burn yourself, remove the lid while the water is boiling and replace it only once you’re ready to serve.
- Throughout the whole brewing process, make sure you use appropriate heat protection (like an oven mitt) when your hands are close to heat. Just like percolating, it’s easy to accidentally burn yourself when you’re brewing with a moka pot.
Final Thoughts
I’ve got a few more tips for you that apply to most coffee brew methods out there:
- Don’t Spill The Beans (Grind ‘Em) – It’s always best to start with whole beans and grind them fresh rather than using pre-ground coffee when you can—and when it’s practical for you. Burr grinders > blade grinders as far as taste goes, but just upgrading your brew method to freshly ground beans instead of pre-packaged grounds that have been sitting in an opened bag in the pantry will make a HUGE difference.
- The Water Temperature Matters – Unless otherwise noted, the best water temperature range for brewing is around 195°F to 205°F. An electric kettle with temperature setting controls is ideal for making sure your water is at the perfect temperature, but if you don’t have one, just allow your boiling water to cool down a minute or two before using it to brew.
- Keep it Clean – Not only is it hygienic to keep your coffee equipment clean, but it’ll help you avoid bitter, rancid flavors (and aromas) from tarnishing your otherwise perfect coffee
- #Ratio – If you don’t know exactly what proportion of coffee to water to use, a good starting point to try is 1:12 (For every 12 oz of water use 1 oz of ground coffee beans). You can always adjust it to your preference through experimentation, but this is a good middle of the road ratio to try out when it’s not otherwise specified for your brewer.
- Filter it Out… Mostly – It’s best to use filtered water in your brew when you can, both for flavor and to maintain your equipment in working condition. I don’t recommend using distilled water, because it tends to make coffee that tastes bland due its lack of natural minerals.