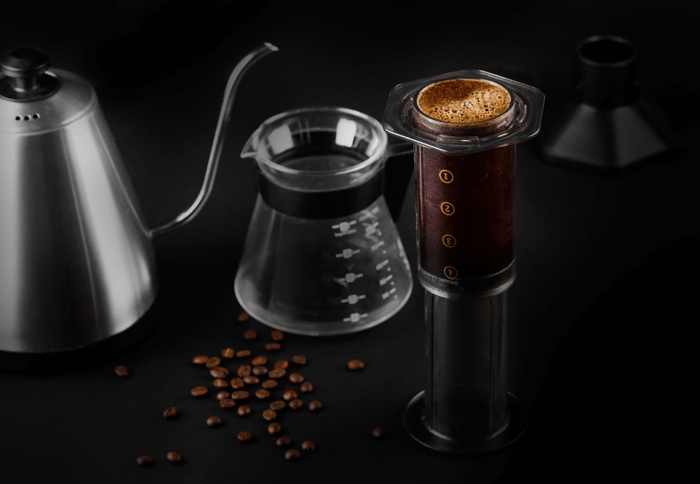

The AeroPress has the well-deserved reputation as being the fastest way to make a solidly good cup of coffee. If it tells you anything, the inventor of the AeroPress was actually impatient while making his pour over coffee (which only takes a few minutes). So you know his invention is going to get that caffeine into you crazy fast. (To drive the point home, it actually pretty much resembles a syringe.)
For this guide, we’ll cover the AeroPress and the AeroPress Go.
Why Use an AeroPress in the First Place?
Besides speed, the other key advantage to using an AeroPress is that it brews coffee in perfect conditions. The quick filtering, temperature, and immersion all combine to produce a perfectly “clear-tasting” cup of coffee—one that allows the drinker (i.e. you) to better experience the subtle flavors between different types of coffees.
Since AeroPress coffee makers are so compact and lightweight (and hard to break) they’re the perfect thing to keep you caffeinated while you’re roughing it: at a campsite, hiking through the woods, backpacking in the mountains—even out on the water. AeroPress even introduced a more portable version specifically designed for travel: the AeroPress Go.
So what’s the drawback? Well, it makes just one or two cups of coffee at a time. But that’s not much of a drawback, and for some people it might even be an advantage. As much as I personally love the pour over method for getting my caffeine fix, if I make a full pot at once I do tend to end up with a lot of leftover coffee that I have to either microwave or drink “iced.” So if you’re like me and you tend to drink 3-4 cups over the course of a couple hours, an AeroPress (or its little bro, the AeroPress Go) might be perfect for you.

Using an AeroPress
Some general steps for using an AeroPress are:
- Use an electric kettle to heat filtered water to approximately 200 degrees.
- Measure and grind your coffee beans out to a medium fine grind.
- Add the filter and your coffee, and let the coffee “bloom” for 30 seconds. (Wet the grounds and let the coffee sit—this results in the grounds releasing CO2 and appearing to “grow”)
- Add the rest of the hot water from the kettle and stir.
- Press down on the plunger until all the hot water is forced through the filter.
Using an AeroPress Go
While the AeroPress Go is designed for travel, some people use it as their standard home coffee brewing machine as well. Since the main difference is the size, it operates under the same basic principles as the original, with some slight mods to the process:
- Heat water up until it’s almost boiling (I’ll assume you don’t have a thermometer with you when you’re using the Go—but hey if you do, aim for approximately 200 degrees.)
- Put a filter in the filter cap and twist the filter cap onto the chamber.
- Stand the chamber on the mug (the Go comes with its own mug for this, but you can use your own as well) and use the included scoop to drop one (for an 8oz cup) or two (for a 16oz cup) rounded scoops of finely ground coffee in the chamber. Shake the grounds until they’re level.
- Pour your hot water into the AeroPress Go chamber and stir it for about 10 seconds
- Insert the plunger to create a vacuum seal, and slowly, gently push down until it reaches the coffee grounds and you can’t push it any further.